
 |
Chicken Piccata is one of Poppa Nick’s specialties. It’s lemony, buttery, chickeny deliciousness cannot be denied.
Pops loves sharing this kitchen creation with his family and friends. The quiet sighs; the “oohs and aahs” of satisfaction that float up from the family table as his guests plow through a plate of Piccata expertly prepared are an expected outcome.
But I suspect that he real reward for making this dish is in the preparation phase for Primo. “Piccata” loosely translated in Italian means to “Pound Flat”
Pops is one of the sweetest guys on the planet. You’ll never hear him speak a cross word about anybody, but making “Piccata” is like a little mental exercise program that helps him to consistently maintain his sweetness. He gets to exorcise all the demons of his day by making clouds of flour fly, splattering hot olive oil all over the kitchen, and beating the crap out of chicken breasts with the flat side of a meat cleaver.
It's an adult expression of his inner child stomping in mud puddles to let off some steam, fully well knowing he’s gonna catch hell from Gramma Lena when he gets home.
But instead of catching hell, he instead catches the sauce of this incredible dish with a fat slice of Italian Bread from the local artisan bakery; his final reward of ultimate yummiosity for the labor of preparation.
Let me rephrase; He catches a little hell from the Lovely Linda for messing up the kitchen in epic proportion, but as long as he serves this dish up on a regular basis for Mom and cleans up meticulously after himself, he can put that genie back in the bottle.
It's a little game of “thrust and parry” they play with each other which has kept them together for 57 years and counting.
Live Well, Love Hard, and Laugh Often ~Poppa “Primo” Nick Rossi
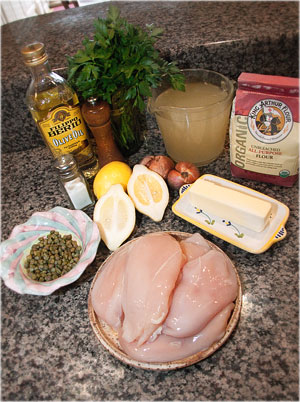
Ingredients
Here’s what you’ll need for four servings and plenty of leftovers for lunch:
2 lbs of Organic Boneless Chicken Breasts
2 Healthy Sized Bulbs Of Shallots
4 Lemons
30 oz of Chicken Stock
8 tablespoons of medium grade Olive Oil
1 Stick Of Butter
4 tablespoons of Capers, drained.
Salt and Freshly Ground Pepper
Approximately 4 tablespoons of fresh Italian Flat Leaf Parsley, finely chopped
The Prep Phase
 Step #1. “When Life Hands You Lemons, To Hell With The Lemonade. Make Piccata!”
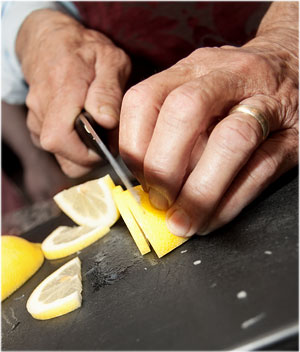
- Slice in half one lemon lengthwise. Slice each half into what Primo calls “Yellow Moonies” (technically, yellow “half moonies”)
- Slice the remaining three lemons widthwise. Using a hand juicer, squeeze the juice, pick the seeds out of the pulp, and reserve both the juice and the pulp. Set aside.
Step #2 “Choppa Da Parsley”
Rinse, Pat Dry, and Finely Chop by hand enough Parsley to yield four heaping tablespoons. Primo strongly advises not to use a food processor for chopping parsley, as it has a tendency to turn to green gloop before achieving its proper consistency of “finely chopped”.
Step #3 “Choppa Da Shallots”
Roughly chop the shallots, aiming for a “chunky consistency”
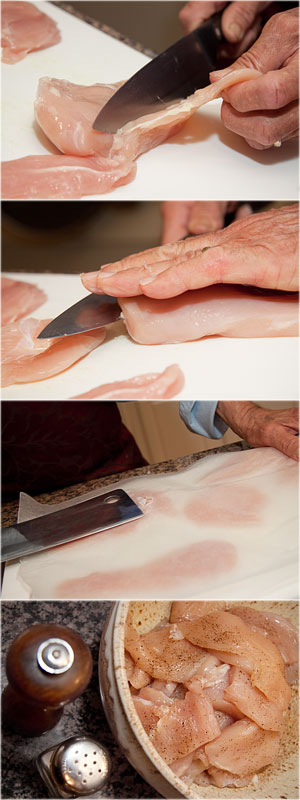 Step #4 “Mr. Chicken Meets The Knife.. and Then Gets WHACKED!” or “Bad Day For Mr. Chicken”
- With a very sharp knife, cut the little extraneous bit of meat off the breast.
- With your hand atop the breast, slice through the entire length of the breast, halving it.
- Place the chicken pieces (the two halves and the little extra bit) between two sheets of waxed paper.
- WHACK ‘EM! Pops uses the flat side of a meat cleaver. You can use a five pound rubber mallet from the hardware store. Pretend that the chicken is the bully that used to beat you up in grade school, or your boss who’s giving you a hard time at work. Have fun with the fantasy aspect of this step! Flatten them out. Atta Baby!
- Salt and liberally grind pepper over the flattened cutlets on BOTH SIDES
- Cut the flattened cutlets into “scallopini”, and toss them in a bowl.
- Repeat the process for the remaining breasts until you end up with a bowl full of chicken scallopini.
Step #5 “Adding a little insult to the injury of Mr. Chicken....”
As if Mr. Chicken hasn’t already gone through enough, now you’re going to boil him in oil.
- In a large frying pan, pour 2 tablespoons of oil and jack the heat to medium-high. get the oil good and hot.
- While the oil is warming, throw enough scallopini (to cover the surface of your frying pan) into a bowl of flour, making sure that they are completely coated with white stuff.
- Place each scallopini in the hot oil, covering the entire surface of the pan.
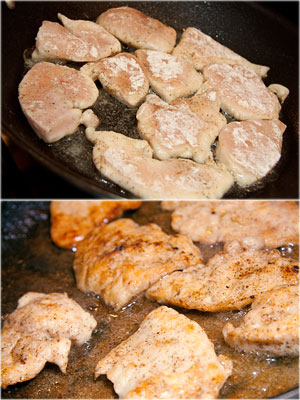 Check each scallopini. Make sure they achieve a “golden” color. Don’t overdo this visual check, but when they’re ready, flip ‘em and brown the other side.
- Each piece will finish at different times. Pan heat, and Scallopinis aren’t uniform. As they finish, place each golden scallopini into an oven safe bowl. When the entire batch is finished, place the “warming bowl” in the oven at the lowest setting possible (Pop’s oven goes down to 120 degrees, but not many ovens can do that)
- Repeat the process, without cleaning the pan! Oil, Dust, Fry, Check, Flip, Fry, Check and then into the warming bowl in batches until all the chicken is done. Keep them all nice and warm in your oven.
By the time you’re finished, you’ll have a beautiful nut brown roux in your frying pan. That’s the basis of the sauce that will be finished in these last steps.
Step #6 “Getting Lost In The Sauce”
- Let your frying pan cool down some.
- Over medium heat, toss the shallots into your “roux pan” and break them down slightly. Don’t burn ‘em, just sweat them.
- Pour the stock in the pan and turn up the heat to “high”, bringing the entire mixture to a boil as you deglaze the pan.
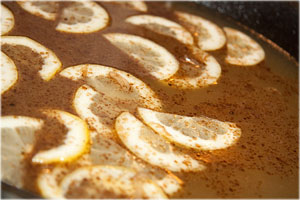 As the sauce is boiling, add the little “half moonies” of lemon slices
- Reduce the overall volume of the sauce by approximately half.
- Add the lemon juice and lemon pulp mixture. This is a subjective step. Some folks like it really lemony, others not so much. Add the lemon mixture according to taste and feel (along with some armchair quarterbacking knowledge acquired from making this dish several thousand times) until you get it where you want it.
 Add the capers.
- Keeping the heat high, let the sauce to continue to reduce in volume by ¼ to ⅓ . It should really be getting thicker in consistency by now. Keep stirring!
- Add the butter and parsley; stir well until all the butter is melted.
Pulling It All Together
Pour the sauce over the chicken scallopini in your warming pot. That’s it. Let’s Eat!
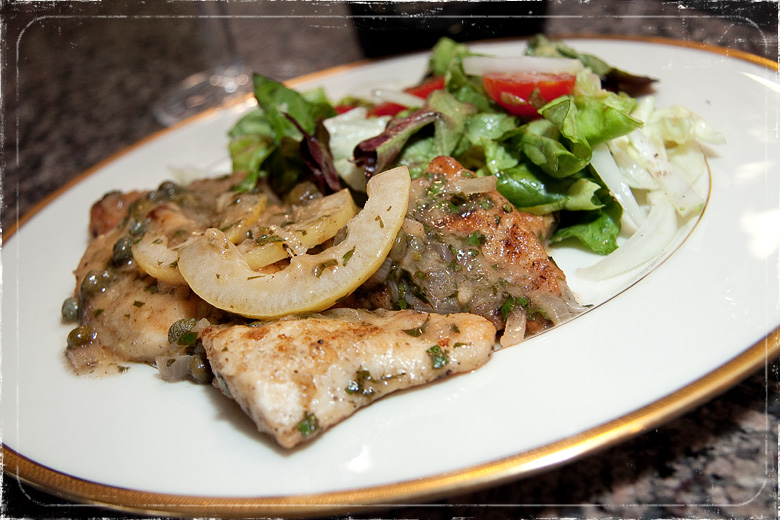
Plating
Pull three or four scallopini out of the pot and onto a plate. Spoon the succulent sauce liberally over each serving. Serve with a fresh garden salad, but most importantly, serve with a few hearty slices of a quality Italian bread.
The best part of eating this dish is the mopping up of the sauce left on the plate with the bread. Pops call this “making scarpetta”.
I just call it delightful, and you will too.
“Now Is The Time To Taste The Test Of Time and The Test Of Nature ~
All On A Liddle Dish...HA! How great is THAT?”... Poppa “Primo” Nick Rossi.
Mangia Bene!
|
| Live Well, Love Hard, and Laugh Often ~Poppa “Primo” Nick Rossi |